Grade K-2 Meetings in Teams
This tutorial describes how to set up a regular meeting time in Teams for students that do not have a flcoe account. It will also show how to set up access to the meeting in Clever.
The steps are easy.
- Create a meeting
- Adjust the settings
- Share the meeting link in Clever
- Run a meeting - Accept students/Ending Meeting
Also please note the information at the end on ending your meeting.
1. Create a Meeting in Teams. This can be a recurring meeting.
Meetings are created by clicking the new meeting button on the Calendar section in Teams.
 Give your meeting a name and add the date and time of the meeting. This date will become the first day of the class if you make it a recurring meeting. The required participants box must have an entry. You can put your own name in this blank. (Failure to enter a participant will cause the link for your meeting link to not appear. The link will be needed later.)

You will need to select Send on the top right of your screen.

To make the meeting a recurring meeting, select a choice from the drop-down box underneath the date.

After selecting Monday through Friday, you can customize the days if your class will not meet every day by going back and selecting Custom from the drop-down box.

Change the meeting start and end dates. The end date can be the end of the school year.

When your meeting details are complete, be sure to click on Save on the top right of your screen.

2. Adjust Meeting Settings.
Navigate to your meeting in the Teams calendar and click on an occurrence and select Meeting Options.

Change the two marked settings to "Only me"

These settings will prevent users from joining the meeting without you and from taking control of a presentation.
3. Share the meeting link in Clever
First, click on an occurrence of the meeting in the Teams calendar again and look for the Join Microsoft Teams Meeting link in the description box at the bottom. Right click on the link and select Copy Link.

Now log into Clever and select a class.

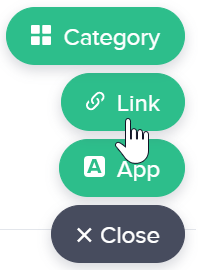
Inside of the class, you can add a link. 
Paste the link from the meeting into the box.

Add a name and category for your link and select an icon. You can upload different icons.
Your meeting is ready to go.
Teacher: To access your meeting, go to the meeting on your calendar and click Join.
Students: Your students will use the link that you placed in their Clever pages to join the meeting. Students will join as a guest and will have to enter their name when they join. Please require students to use their real names. Do not admit anyone whose name you don't recognize as one of your students.
Your students will be put in the “lobby” and you will have to admit students to the meeting. Either way of admitting shown below is fine.


Having students put into the lobby and waiting for the teacher to admit them prevents students from getting into the meetings without the supervision of the teacher.
Ending the Meeting.
It is also important that you don't just "Leave" the meeting at the when you are done, but that you "End Meeting." If you leave the meeting and there are still students in the meeting, then they will remain in the meeting, unsupervised, with whoever else is also left.
To end the meeting, click the down arrow beside the Leave button and select End Meeting. This will remove all the participants and end the meeting as you leave. Students will not be able to re-join the meeting without your permission.

Was this article helpful?
That’s Great!
Thank you for your feedback
Sorry! We couldn't be helpful
Thank you for your feedback
Feedback sent
We appreciate your effort and will try to fix the article